Bandaging is a common practice to achieve various goals in small animal practice. Limb or fracture immobilization, coverage of open wound management, coverage of a surgical site, and prevention of patient interference are all common reasons (though not an exhaustive list) to apply a bandage. While commonly done, bandaging is significantly more complicated, and even dangerous, than often appreciated.
Anatomy of a Bandage
Bandages can be dissected into primary, secondary, and tertiary layers.
- The primary layer is the sterile layer that contacts the wound that absorbs excess moisture and provides protection of the wound. For a primarily closed surgical incision, this would be a nonadherent material (i.e. Telfa, or similar). In an open wound, this could be a material that encourages enzymatic debridement, granulation tissue development, or epithelialization. The advent of newer primary layer options that create a consistent moist wound environment have replaced wet-to-dry bandaging as the standard of care.
Wet-to-dry bandages allow bacteria to move both directions causing nosocomial infections that are painful when removed, require more frequent bandage changes, and remove granulation tissue and important cytokines and proteases, which slows overall healing. This, in turn, Increases the cost of care and prolongs recovery.
- The secondary layer provides padding, absorbency, and immobilizes the limb. Typically, this layer is cast padding followed by cling.
- The tertiary layer is the outside layer, typically vetwrap, with or without a rigid component such as fiberglass or a commercially available splint.
Bandaging Dog and Cat Limbs
Limb bandaging is the most common indication for bandages placed in small animal practice. Preventing complications with bandages requires appropriate decision-making and technique and communications on our part, as well as appropriate owner participation at home.
The following are common issues we see with bandages:
- Bandages that are too tight or too loose. Cast padding is difficult to place too tight because it typically tears before it is too tight. If you have the cast padding that is dimpled on one side, then you can pull it tight until the dimples disappear, and it should be an appropriate tightness. Cling can be placed too tight, which most commonly happens if inadequate padding is placed initially. Erring on the side of more padding, using a gentle, consistent tension on the material, and overlapping material by 50% is good practice.
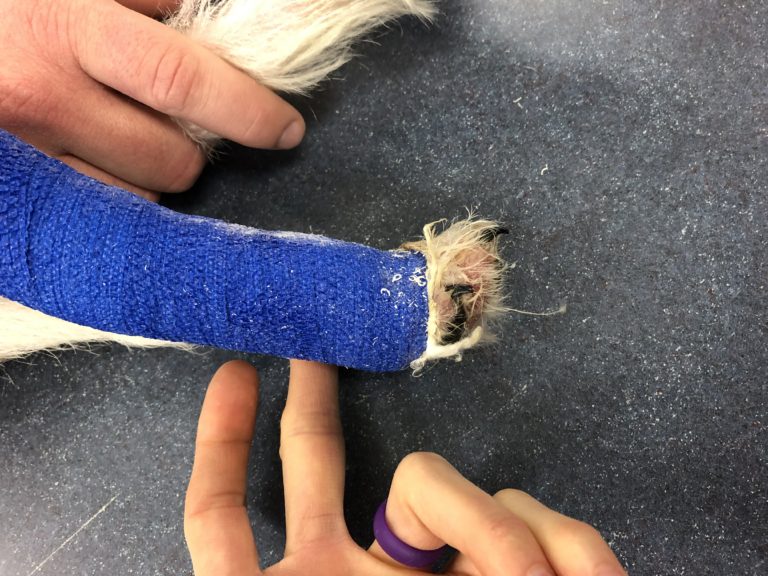
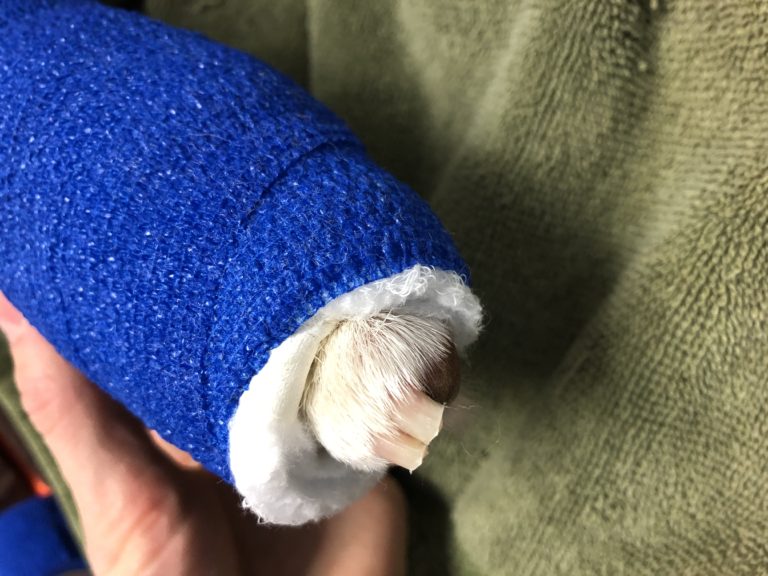
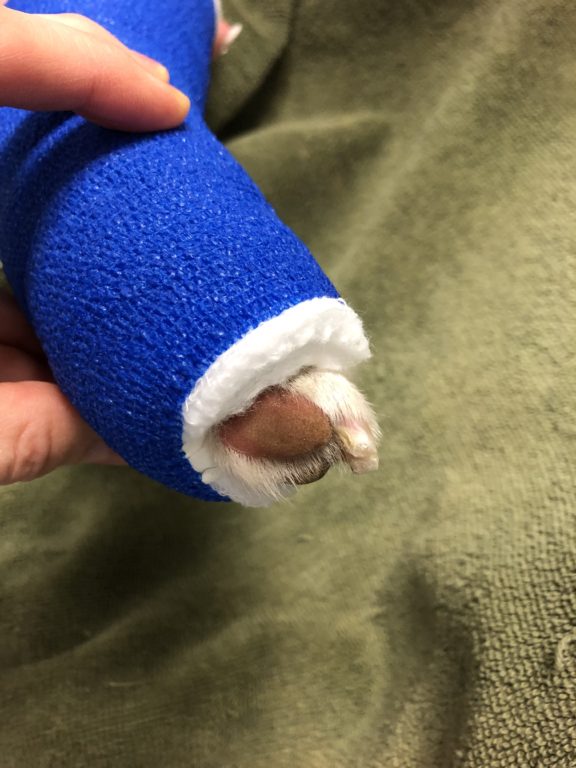
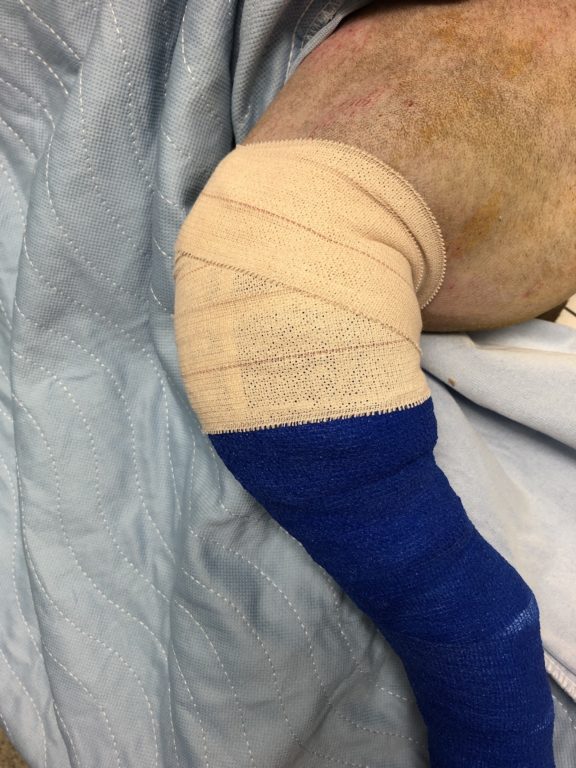
- Too much of the toe is exposed. Commonly we see the recommendation that digits 3 and 4 should be exposed so the feet can be monitored. However, the entirety of those digits should not be out because it can cause a tourniquet effect (figures 1 -3).
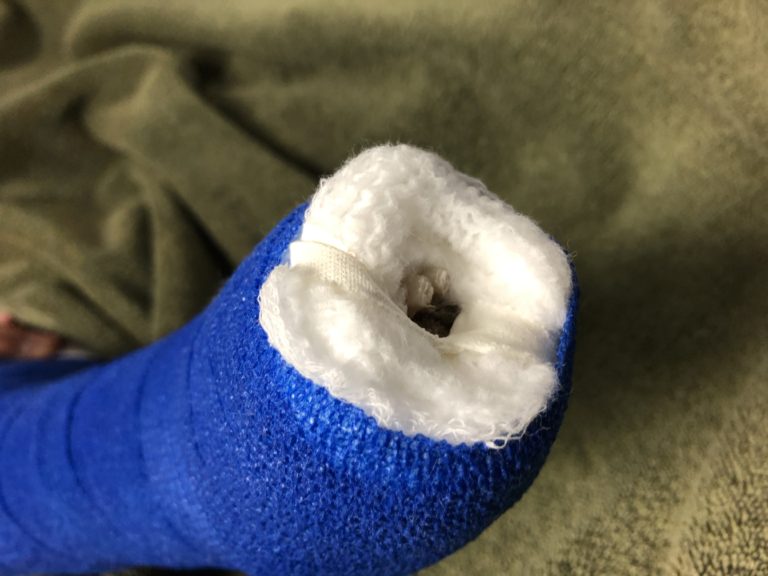
We recommend that the toe nails of digits 3 and 4 be visible and the toe pads palpable in the bandage (See figure 4).
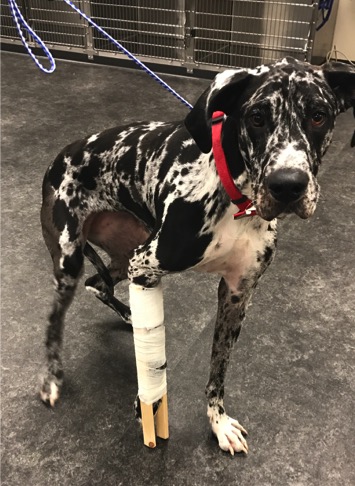
- Incorrect bandage placement around joints. Bandages should end below or above joints to prevent rubbing at a flexural surface and causing wounds. Bandages should also not start at joints, and in the case of limbs, the entire leg must be bandaged distal to the specific targeted area to prevent damage (See figure 5).
- Improper reliance on adhesives. Adhesives, such as Elasticon®, will not keep a poor-quality bandage in place so should not be used at the top of bandages, as well as adhesives are dangerous on skin (Picture Tape at top). We commonly use Elasticon at the bottom of bandages as it withstands walking better than typical vetwrap.
- Insufficient pressure distribution. Vulnerable areas like the hock, olecranon, carpus, and tarsus need special attention to prevent pressure sores. You can use donuts made of cast padding to distribute pressure more evenly around boney protuberances.
- Poor tape placement. Tape stirrups (figure 6) are placed longitudinally and on healthy skin. Tape placed circumferentially around a limb is very dangerous.
Bandaging the Trunk, and other Difficult areas
Bandaging areas of the body, which is most typically done to cover open wound management, is trickier. Tie over bandages (figure 7) are a good option for many areas like the trunk, hip, axilla, chest, and particularly larger or deeper wounds in those areas.
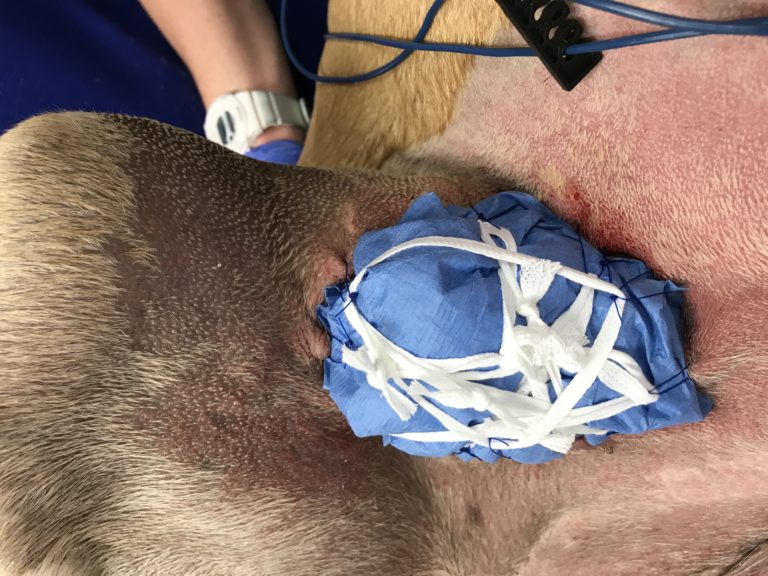
The primary, secondary, tertiary layers are used like in any bandage. Then the bandage is held in place by umbilical tape looped through suture loops placed circumferentially around the wound. A larger non-absorbable suture is used to place those loops, which should have a wide base and be full thickness.
Owner Communication is Crucial
Bandage care at home is out of our control, but we must discuss as fully as possible the time, financial, and monitoring commitments required of the owners to achieve the best possible patient outcomes. Owners need to be honest with themselves and the veterinary team about limitations in ability to recheck routinely, monitor the bandage, confine the pet, and financially commit to the entire healing process (See figure 8).

With some careful attention and communication, bandaging can be done safely and effectively to achieve great outcomes for our dog and cat patients. If you have any questions about a patient’s bandaging, need for surgery, or specialty care in general, please do not hesitate to contact a member of our Surgery team.